How to Upload a Modle to Mmd
VIDEO TUTORIAL
OVREVIEW
MMD model can exist easily imported into DesktopMMD, yous merely need import MMD PMX model file into Unity and brand some modest adjustments then you tin consign the model file and import into DesktopMMD.
STEP
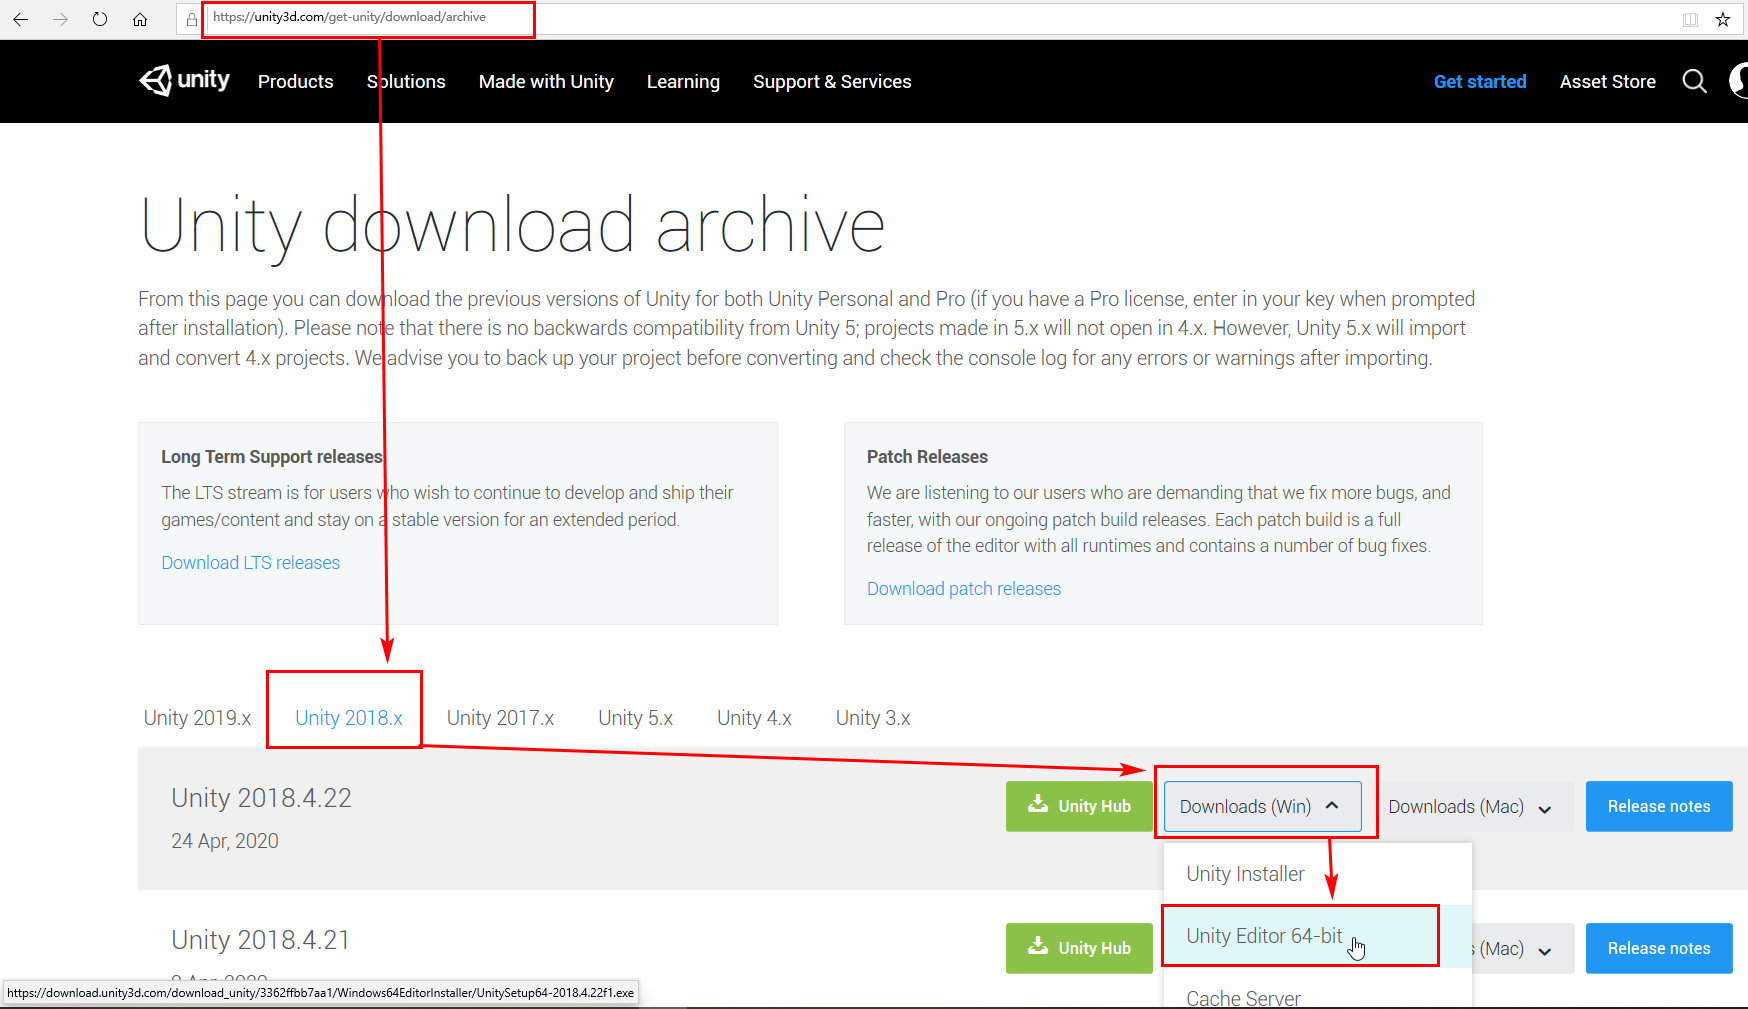
1. Download and Install Unity:https://unity3d.com/get-unity/download/archive
ii. Download the Unity Template Projection "DMMD_Model_Convert_UnityProject" and unzip

3. Run Unity and open up the template projection "DMMD_Model_Convert_UnityProject"

4. Download some MMD Model .PMX files from spider web,I download this "MMD - Kizuna Ai by Justdesuchan" model from web as a Demo. unzip it and Drag and drop the MMD model file folder "MMD - Kizuna Ai by Justdesuchan" into Unity project view .

5. Select the MMD model PMX file, and check the iii checkbox at right-bottom,and click push "Agree"

6. then click the push button "Procedure", wait for v minute ,unity volition generate FBX file (Bluish foursquare icon),select this FBX file:

vii. Selecting the FBX file with this blue foursquare icon, select "Humaroid" from the "Blitheness Type" drop-down box in the Rig cavalcade on the correct side of the property window, and so click the "Apply" push button

viii. And so click the "Configure" push button in the lower correct corner

9. Click "Enforce T-Pose" in the "Pose" driblet-down box in the lower right corner, then click the "Done" button on the right, click "Use" in the pop-up dialog box, and expect a moment.


10. Wait for Unity finish processing, drag the FBX file with the blue square icon to the "Bureaucracy" window on the left, double-click the blueish icon, and yous can see the model in the "Scene" window on the left

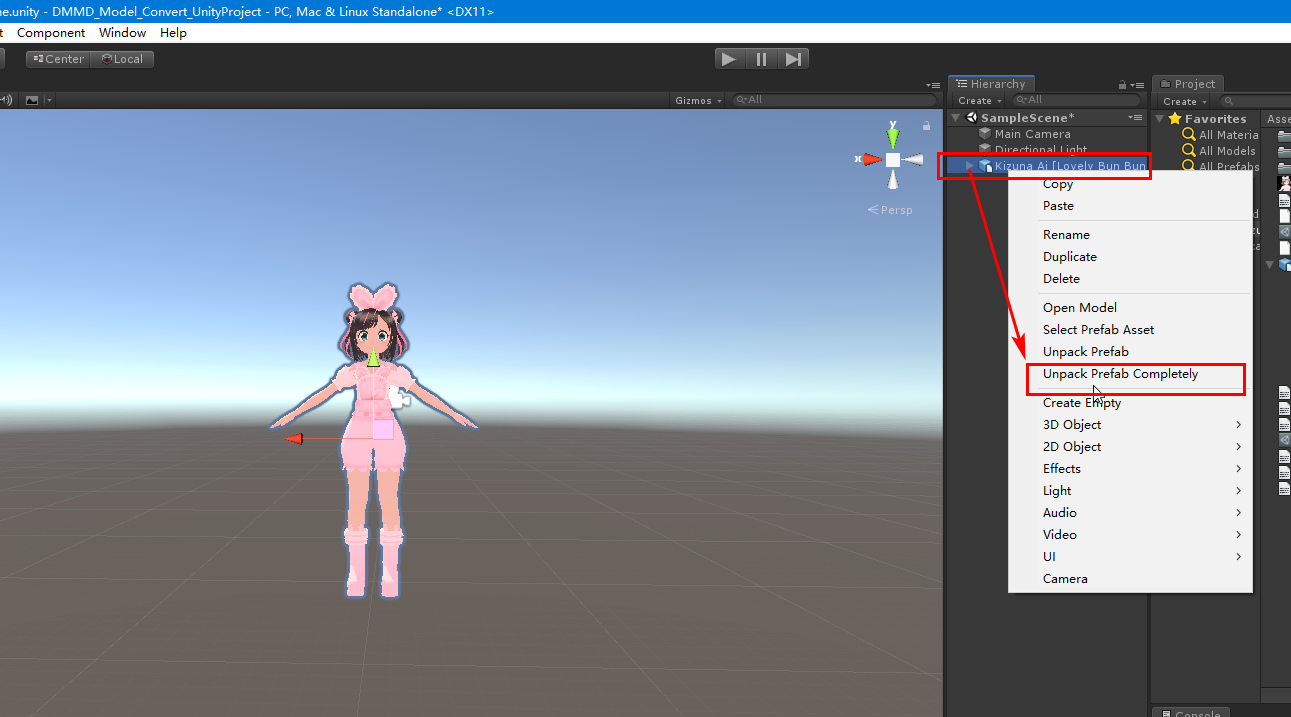
eleven. Select "Unpakc Prefab Completely" in the correct-click menu, and then change the name of this object to a simple and short name. It is best not to have a decimal subclass in the symbol brackets, for case, "Kizuna AI"
12. In the properties on the right side, select "Bullet Physics" from the "Physics Engine" detail on the Model page under the "MMD4 Mecanim Model" cavalcade.

13. Click the "Add Component" button in the lower correct corner to enter text "cap",then select "Sheathing Collider" in the list to add information technology

Click the "Edit Collider" button in the added "Capsule Collider" column to accommodate the iv bespeak of the dark-green ball in the Scene window on the left side of the screen

Adjust the four point of the green ball in the "Scene" window on the left side of the screen and so that the lower signal is exactly at the bottom of the model's foot, the upper point is just at the top of the model'southward head, and the left and correct sides are just attached to the sides of the model's body Just the capsule shape that wraps the model.

Y'all can hold downwards the Alt key on the keyboard, utilise the left mouse button to hold and drag the Scene view blank space to rotate the model to see if it fits

16. Elevate the "Kizuna AI" object in the "Bureaucracy" column to the "Project" column to generate a bluish square icon Prefab file, as shown below:

17. In the "Project" column, switch to the "Materials" folder nether the MMD model folder, select all the material ball files inside, exclude the "Eye", "Eye Hi", "Middle HL", "Hair Shadow" Class files, then click the Shader drib-downwardly box on the tiptop right

Select card item "MMD4Mecanim">>"MMDLit-BothFaces"

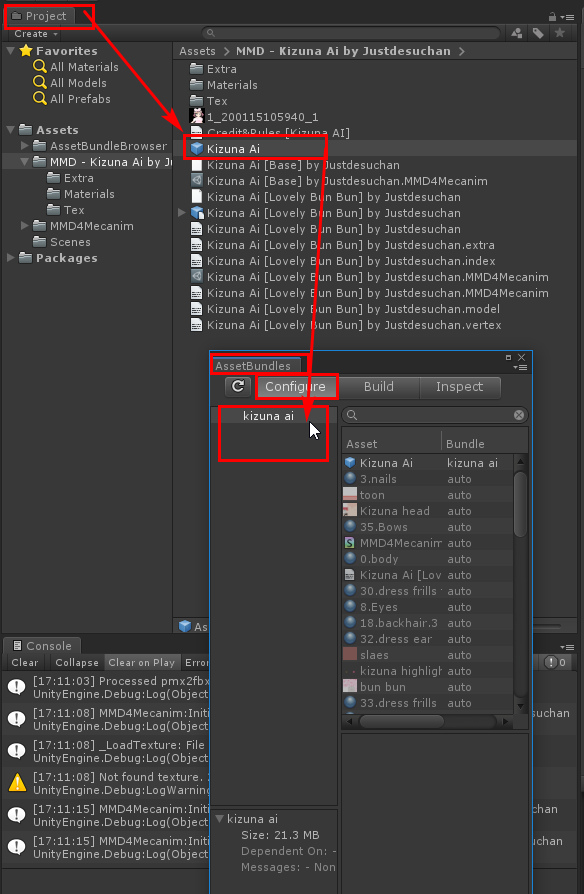
18. Click the main menu "Windows" >> "AssetBundle Browser" at the top of the window to open the "AssetBundle" window, switch to its "Build" page, and enter an existing folder path in your computer in the Output Path to shop the package for later For the model files that come out, the "Eastward: \ AB" folder is ready hither, which will exist like shooting fish in a barrel to find later.

19. Drag the "Kizuna Ai" prefab file of the blue foursquare icon just generated in the "Project" column to the "Configure" page of the "AssetBundle" window, then switch to the "Build" page and click the "Build" push button. See the generated model file in the E: \ AB \ folder
20. Find the generated model file in the path "Due east: \ AB", be careful not to uses the ".manifest" file, which is only 1K in size.
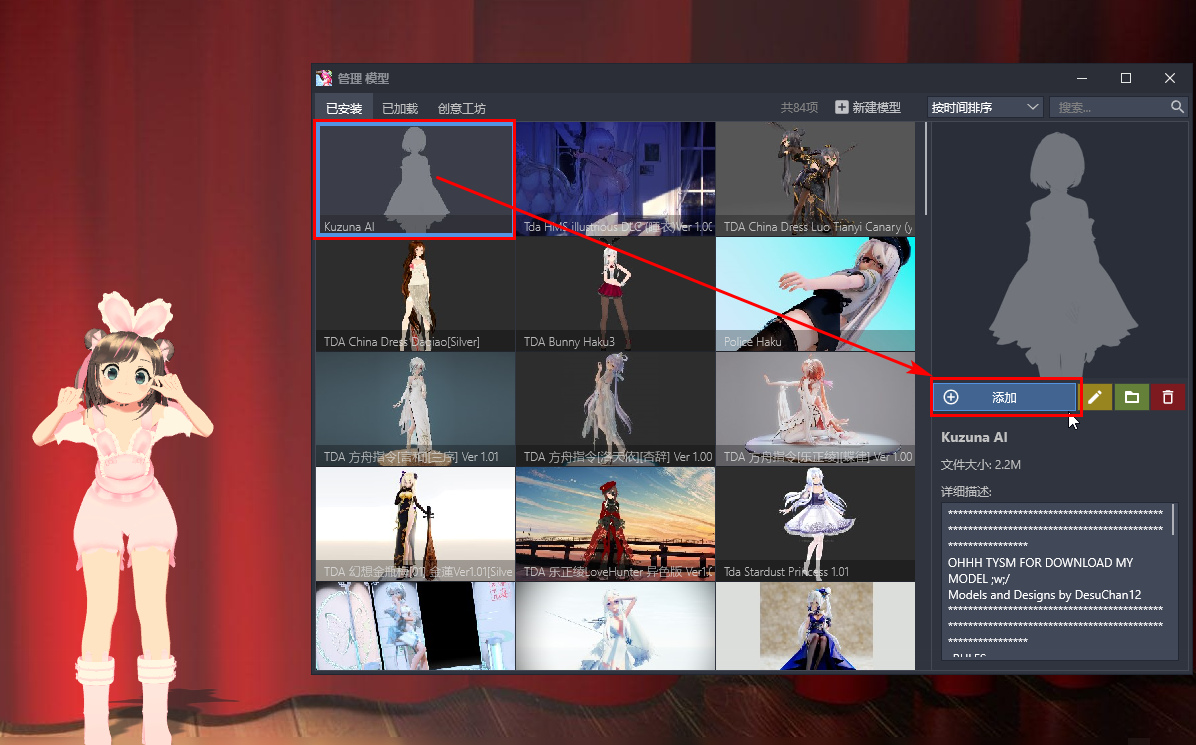
Run DesktopMMD , open the "Manage Model" in its tray menu, then click "New Model" at the top of the opened window, enter the model name "Kizuna AI" and and then click "OK" button


And so select the model file just exported in the model editing window, and re-create the contents of the readme.txt file in the MMD model folder to the "description", select a preview jpg image file, click OK, Done!

21. Now you tin add the newly created model to the desktop:
You can also click "Submit to Steam Workshop" in the right-click bill of fare to share it :)

Source: https://steamcommunity.com/sharedfiles/filedetails/?id=2088018876
0 Response to "How to Upload a Modle to Mmd"
Post a Comment